Elementor templates are a powerful tool for website designers and developers looking to streamline their workflow.
Using the Elementor templates in the Elementor template library, users can quickly import and customize templates to fit their specific needs.
Whether you’re building a new website from scratch or updating an existing one, using Elementor templates can save time and effort while still allowing for customization within the Elementor editor.
The Elementor template library offers a variety of templates, including theme builder templates, section templates, and pop-up templates.
Theme builder templates allow users to create custom headers, footers, archive pages, and more.
Elementor Pro users have even more options with the Envato Elements integration. This integration provides access to thousands of additional premium design assets that can be used in conjunction with Elementor’s page builder.
Using elementor templates is simple: just select the desired template from the library and import it into the Elementor page editor.
From there, you can customize colors, fonts, images, and other elements to match your brand’s style and messaging.
Benefits of Using Elementor: Why You Should Choose It
Saves time and effort
Using Elementor templates can save you a lot of time and effort in creating a website from scratch.
With pre-designed templates, you can easily customize them to fit your needs and preferences, without having to start from scratch.
This is especially useful for those who are not familiar with coding or web design.
Elementor offers a wide variety of templates that cater to different niches such as business, e-commerce, portfolio, blogs, and many more.
Using Elementor templates which is professionally designed that are ready to be used. These templates come with pre-built sections that you can easily drag-and-drop into your website.
In addition to saving time in the design process, using Elementor templates also saves time in the maintenance of your website.
Since the templates are designed by professionals, they have already been optimized for speed and performance. This means that your website will load faster using Elementor templates as compared to building it from scratch.
User-friendly interface
One of the biggest advantages of using Elementor templates is its user-friendly interface. Even beginners can create professional-looking websites with ease.
The drag-and-drop feature makes it easy to add elements and customize them without any coding knowledge.
The interface is intuitive and easy to navigate. You can access all the tools you need on one screen without having to switch between menus or pages.
The live preview feature allows you to see how your changes will look in real-time.
Elementor also has a vast library of widgets that you can use to enhance your website’s functionality.
These widgets include forms, sliders, galleries, social media icons, pricing tables, and many more.
Responsive design
In today’s digital age where people access websites through different devices such as desktops, tablets, and smartphones, having a responsive design is crucial.
Elementor templates are designed to be responsive which means they can adapt to different screen sizes and devices.
This ensures that your website looks great on any device providing a seamless user experience for your visitors.
With Elementor, you don’t have to worry about creating separate versions of your website for different devices.
Getting Started with Elementor Templates: Install and Activate Elementor
To start using Elementor templates, you need to install and activate the Elementor plugin.
There are two ways to install Elementor: by downloading the WordPress plugin from the official WordPress website or by purchasing it from Envato. Once you have installed Elementor, activating it is a breeze.
To activate the Elementor plugin in your WordPress dashboard, go to the “Plugins” section and find “Elementor.” Click on “Activate,” and you’re all set. You can now start using Elementor templates on any page or post in your WordPress website.
When you’re ready to import a template, click on the folder icon at the centre of the Elementor canvas. This will open up the Template Library window. From there, select “Import Template.”

The next step is to choose a template that suits your needs. You can browse through hundreds of pre-designed templates for different types of pages such as homepages, landing pages, contact pages, about us pages, etc. Once you’ve found a template that you like, click on it to preview it.
If you’re happy with how the template looks and feels, click on the green “Import Now” button to import it into your website. The importing process may take a few seconds depending on your internet speed.
Once imported successfully, you can start customizing your new template according to your preferences and needs. With Elementor’s drag-and-drop interface and intuitive design tools, customizing any element of your page or post is easy.
You can change text content by simply clicking on it and typing in new content directly into the editor box. Similarly, images can be swapped out by clicking on them and selecting a new image from your media library or uploading one from your computer.
Other elements such as buttons, forms, videos etc., can be added easily using widgets available in Elementor’s widget panel which is located at left side of editor screen.
In addition to the pre-designed templates, you can also create your own custom templates from scratch. This is a great option if you have specific design requirements that are not met by the pre-designed templates.
To create a new template, click on the “Add New Template” button in the Elementor editor. This will open up a blank canvas where you can start designing your template using various widgets and design tools available in Elementor.
Once you’ve finished designing your custom template, save it by clicking on the “Save” button at the bottom of the editor screen. You can now use this template on any page or post in your website just like any other pre-designed template.
Importing Elementor Templates: A Step-by-Step Guide
Access the Elementor Library
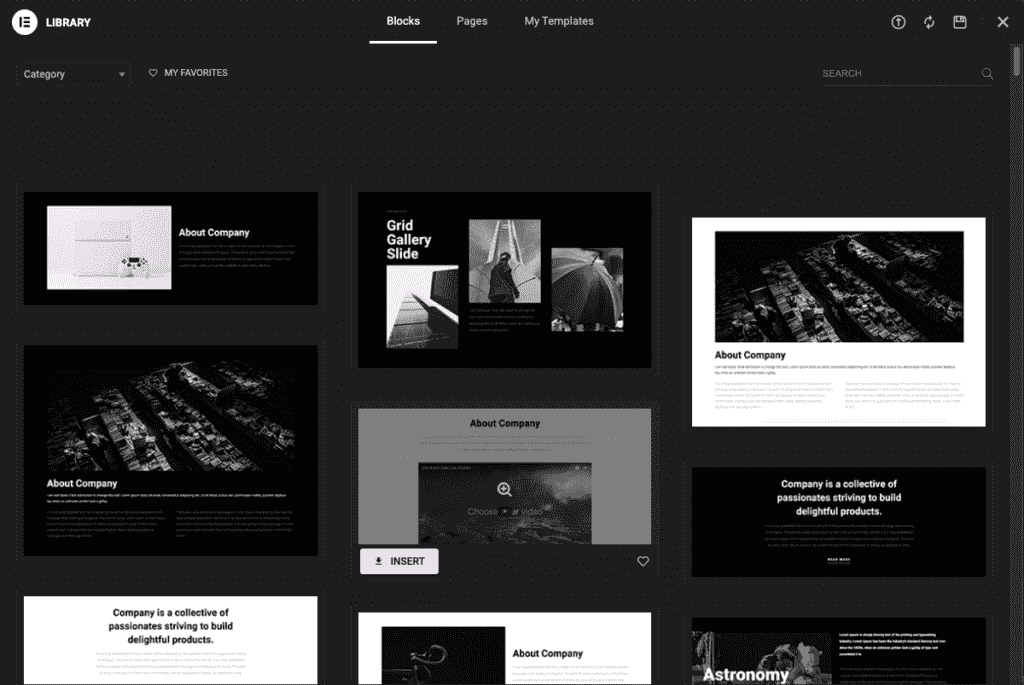
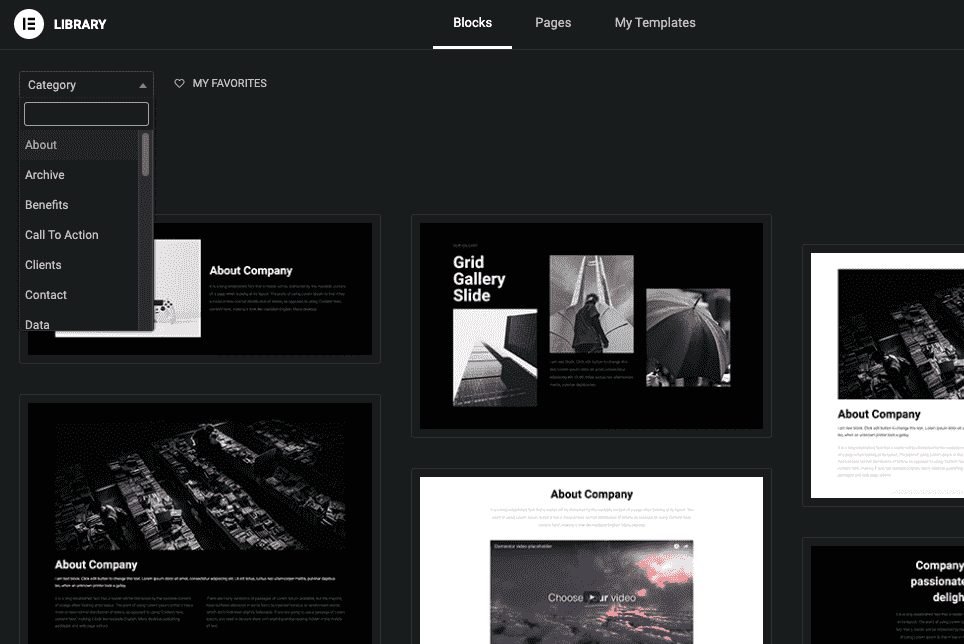
To import Elementor templates, you first need to access the Elementor library. To do this, open the Elementor editor and click on the folder icon in the bottom center of your screen. This will take you to a page where you can browse through all available templates.
Choose a Template
Once you have accessed the Elementor library, it’s time to choose a template that suits your needs. You can filter by category or search by keyword to find something specific. With hundreds of templates available, there is sure to be one that fits your website’s style and purpose.
Preview the Template
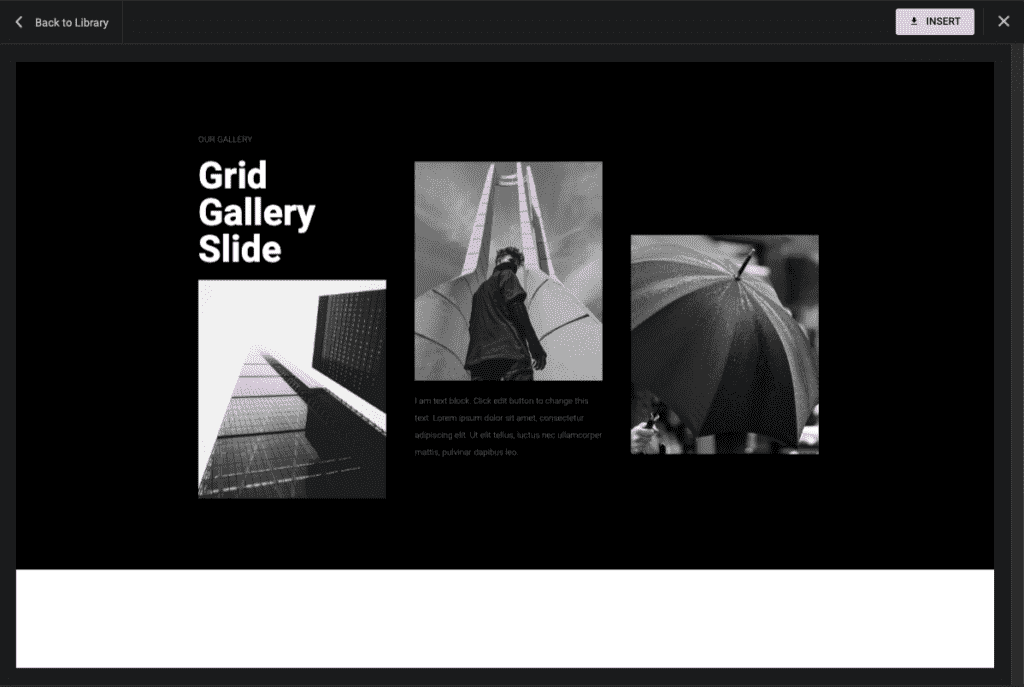
Before importing a template, it’s always a good idea to preview it first. This will give you an idea of how it will look on your website and help ensure that it meets your needs. Simply click on the template you are interested in and then click “Preview” to see what it looks like.
Import the Template
After previewing a template and deciding that it’s right for you, it’s time to import it into your library. Click on “Import” next to the template you want, and Elementor will automatically add it to your collection of available templates.
Export Templates
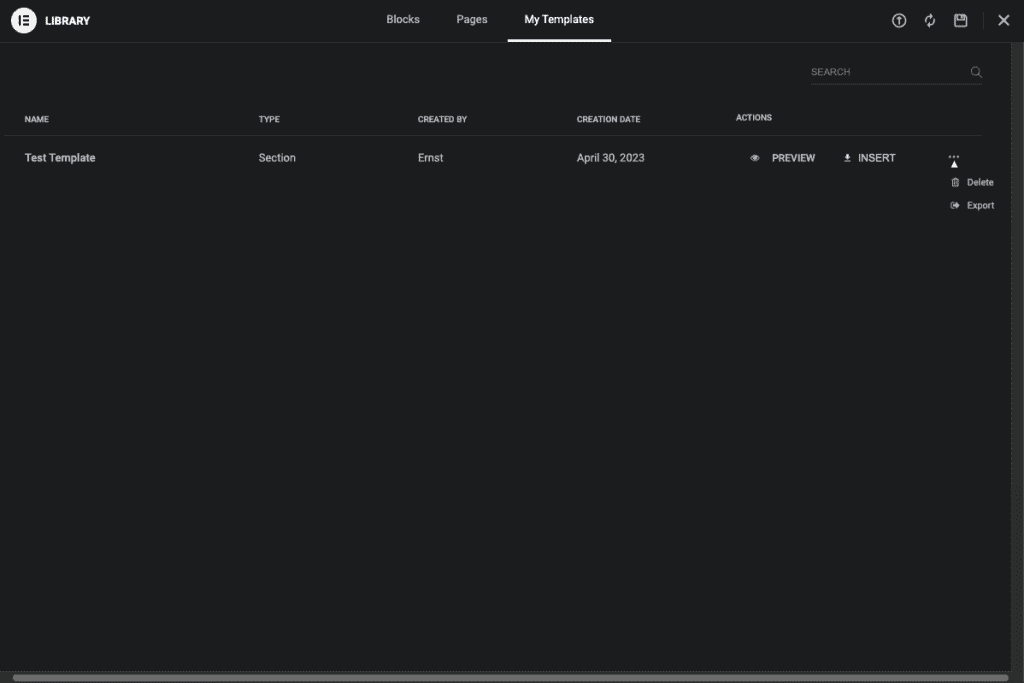
If you’ve created a custom template that you’d like to use on another website or share with others, exporting is easy. Simply select the template from your library and click “Export.” The file will download as an XML file that can be imported into another WordPress site using Elementor.
Customize Your Template
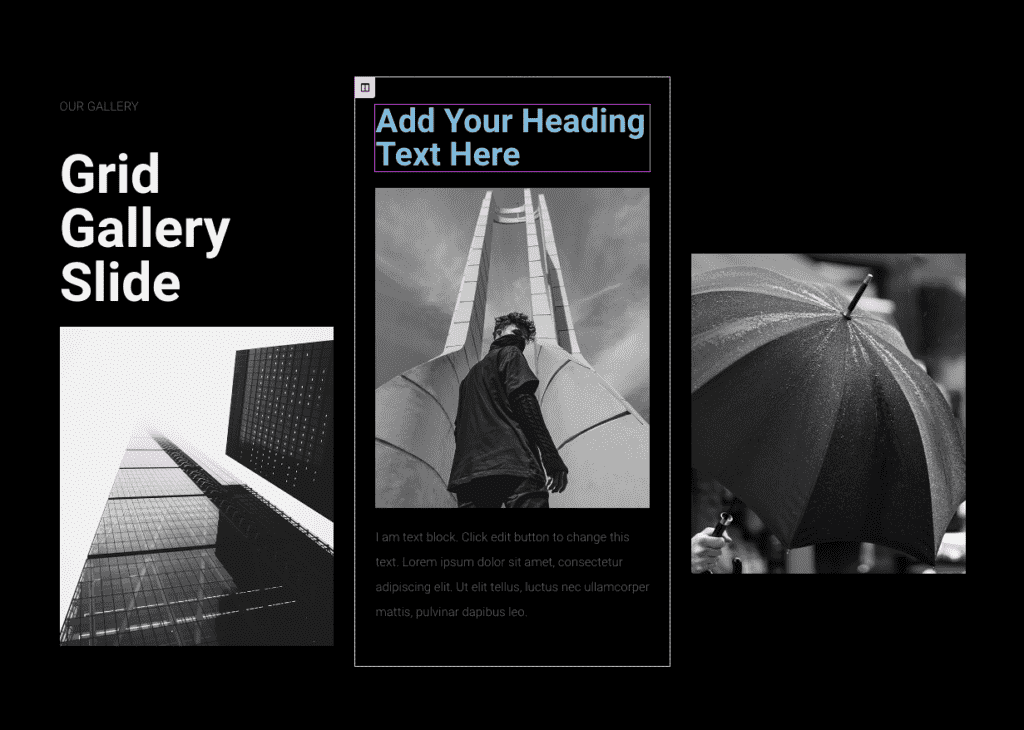
Once you’ve imported a template into your library, customization is easy. Simply click on any element within the template to edit its text, images or settings. You can also add new elements such as buttons or forms using Elementor’s drag-and-drop interface.

One of the best things about importing templates with Elementor is how much time and effort they save when building out web pages. Rather than starting from scratch every time, you can use pre-built templates as a starting point and then customize them to fit your brand and content.
Another benefit of using Elementor templates is that they are designed to be responsive. This means that they will automatically adjust their layout to look great on any screen size, from desktop computers to mobile devices.
In addition, Elementor templates are built with SEO in mind. They are optimized for fast loading times and clean code, which can help improve your website’s search engine rankings.
Elementor also offers a wide range of third-party templates created by professional designers. These templates cover a variety of niches and styles, so you’re sure to find something that fits your needs.
Adding Elementor Templates to Your Pages: Tips and Tricks
Accessing the Template Library
Elementor is one of the most popular website builder out there. One of the reasons for this is its vast library of templates that can be used to create stunning pages with ease. To access the Template Library in Elementor, simply click on the Templates button located at the bottom of your screen.
Once you’re in the Template Library, you’ll see that there are different types of templates available. These include Theme Builder Templates, Section Templates, and Page Templates. Each type serves a different purpose and can be used depending on your needs.
Theme Builder Templates are used to create custom headers, footers, and other parts of your website’s design that remain consistent across all pages.
Section Templates are pre-designed sections that can be added to any page or post to save time and effort when creating layouts. Lastly, Page Templates are complete designs for entire pages that can be customized as needed.
Importing Templates
If you have a template file saved on your computer or have downloaded one from an external source such as a Template Kit or Theme Template File, you can easily import it into Elementor by clicking on the Import button in the top left corner of the Template Library screen.
Once you’ve selected your file and clicked Import, Elementor will automatically add it to your library where it can be accessed whenever needed.
Adding Templates to Your Pages
To add a template to your page using Elementor’s built-in editor, simply click on either the Add New button or select an existing page from within WordPress itself. Once you’re in the editor view for your chosen page/post, click on Edit with Elementor.
From here, navigate over to the Templates Menu located near the bottom right corner of your screen. You’ll see all available templates listed here along with their respective categories (Page/Section/Theme Builder).
Selecting a template will immediately add it to your current layout where it can be customized as needed. Alternatively, you can also add a new section to your page and select a pre-designed Section Template from the library.
Saving and Reusing Elementor Templates
One of the best features of Elementor is its ability to save templates for future use. This makes it easy to create Landing Pages or add new templates to your Kit Library with just a few clicks.
To save a template, simply right-click on the section or widget you wish to save and select Save as Template. You’ll then be prompted to give your new template a name and description before saving it.
Once saved, your template will appear in the My Templates tab of the Template Library where it can be accessed at any time. Additionally, you can also save entire pages as Site Parts or Saved Templates for even more flexibility when designing websites.
Customizing Elementor Templates: A Comprehensive Guide
Editing Elementor Templates for Product Pages
Customizing your website’s product pages is an essential part of creating a unique and engaging user experience that can help increase conversions. One of the best tools to use for this purpose is Elementor, a popular page builder plugin for WordPress.
Elementor offers pre-designed templates that you can customize to suit your brand’s unique needs and showcase your products effectively. With its drag-and-drop editor, making changes to your template’s layout, design, and content has never been easier.
In this section, we will explore how to edit Elementor templates for product pages and add custom elements and features to enhance engagement and conversions.
Utilizing Elementor’s Drag-and-Drop Editor
The first step in editing an Elementor template is to access the drag-and-drop editor. Once you have selected the template you want to use, simply click on the “Edit with Elementor” button. This will take you to the editor where you can start making changes.
The interface is intuitive and easy-to-use. You can drag and drop widgets onto your page or rearrange existing ones by clicking on them and dragging them around. You can also adjust their settings by clicking on them again.
One of the most useful features of Elementor is its ability to create responsive designs easily. You can preview how your page will look on different devices by clicking on the device icons at the bottom of the editor.
Adding Custom Elements and Features
To make your product pages stand out from the competition, it’s important to add custom elements that enhance engagement and conversions. Here are some examples:
Pop-ups: Pop-ups are a great way to capture leads or promote special offers. With Elementor, you can create pop-ups easily using its built-in Popup Builder feature.
Forms: Forms are another powerful tool for capturing leads or gathering feedback from customers. You can create forms quickly using Elementor’s Form widget.
Countdown timers: Countdown timers are a great way to create a sense of urgency and encourage customers to take action. You can add them easily using Elementor’s Countdown widget.
Sign Up for Elementor Pro
While the free version of Elementor is powerful, signing up for Elementor Pro unlocks even more customization options.
With Elementor Pro, you gain access to premium templates, widgets, and integrations that can take your product pages to the next level.
For example, you can use the WooCommerce Builder feature to customize your online store’s product pages with ease. You can also use the Theme Builder feature to customize your website’s header, footer, and other global elements.
Compatibility with Themes: What You Need to Know
Check Theme Compatibility Before Using Elementor Templates
When using Elementor templates, it is important to ensure that the widgets and layouts will work seamlessly with your website’s design. To do this, you need to check theme compatibility before applying any template to your content.
Using the Preview Panel
One of the best ways to check theme compatibility is by using Elementor templates’ preview panel. This feature allows you to see how the template will look on your site before applying it to your content. It gives you an idea of how different widgets and layouts will fit into your website’s design.
Note that advanced features such as dynamic content and display conditions may require access to Elementor Pro or other premium versions of the platform.
Therefore, it is important to consider whether or not these features are necessary for your website before investing in a product.
Design Considerations
When checking theme compatibility, there are several design considerations that you need to keep in mind.
- First, consider whether or not the layout of the template matches the overall layout of your website. A mismatched layout can make your website look disjointed and unprofessional.
- Secondly, consider whether or not the color scheme of the template matches that of your website. A mismatched color scheme can also make your website look disjointed and unprofessional.
- Thirdly, consider whether or not the font style used in the template matches that used on your website. A mismatched font style can also make your website look disjointed and unprofessional.
Accessing Dynamic Content
Dynamic content refers to content that changes based on certain conditions such as user behavior or time of day.
Accessing dynamic content requires access to advanced features such as display conditions which may only be available through premium versions of Elementor.
If dynamic content is necessary for your website, then investing in a premium version may be worth considering.
However, if dynamic content is not necessary for your website, then sticking with a free version may be sufficient.
Installing Elementor: Two Methods Compared
In conclusion, installing Elementor can be done in two ways. You can either install it directly from the WordPress plugin repository or download it from the Elementor website and upload it manually. Both methods are straightforward and easy to follow.
Both methods have their advantages and disadvantages. Installing directly from the WordPress repository is faster since everything is automated. However, downloading from the Elementor website gives you more control over which version of Elementor you want to use.
Regardless of which method you choose, once you have installed Elementor successfully, you will be able to create stunning websites with ease using Elementor templates or by designing your own pages from scratch.


